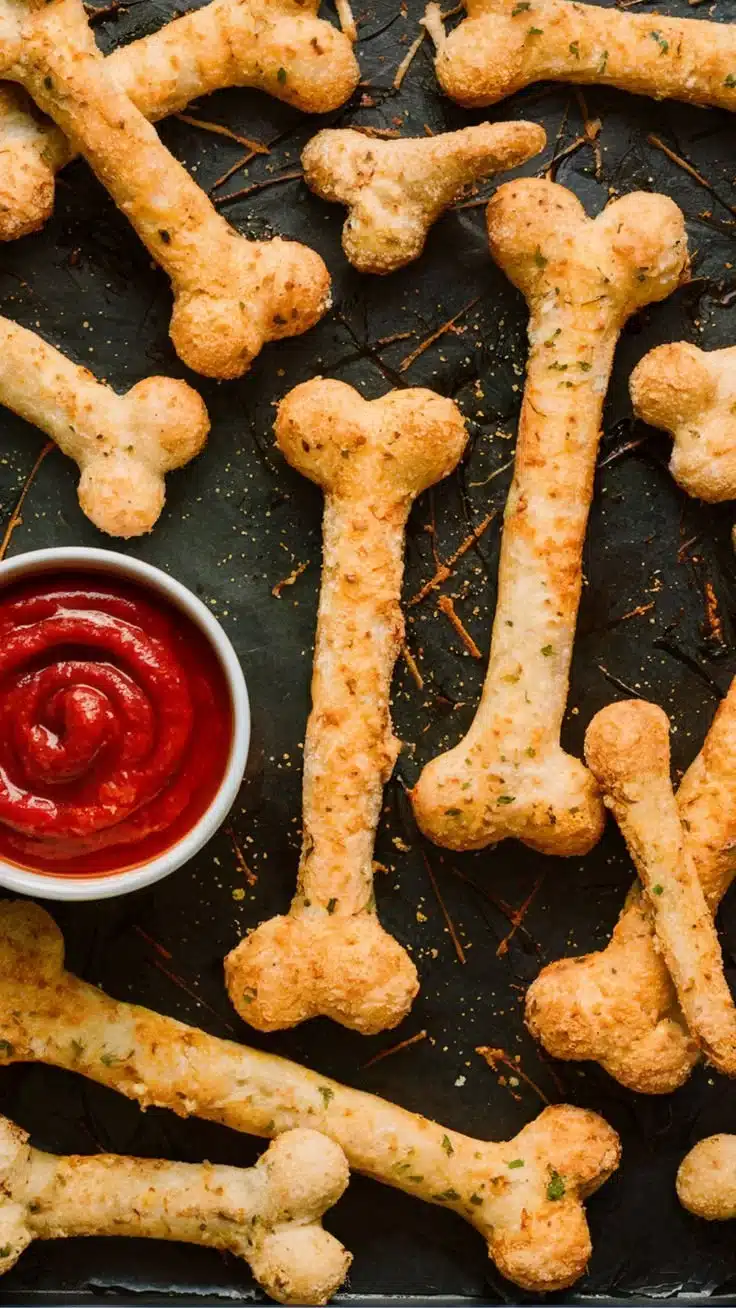
As the crisp autumn air settles in, I find myself reaching for my favorite recipe box, which holds treasures of cozy memories. One of the most delightful surprises I’ve unearthed just in time for Halloween is a recipe for Cheesy Halloween Breadstick Bones. The thought of shaping soft, cheesy dough into playful skeletal forms sparks not only nostalgia but also the glee of creating something special for my family.
I remember the first time I made them, gathered around with my grandkids in the kitchen, flour dusting our noses and laughter filling the air. We rolled, twisted, and giggled as we formed the dough into bone shapes. The aroma of buttery bread mingling with the slight sharpness of cheese transported me back to my grandmother’s kitchen, where love was the secret ingredient in everything. These Cheesy Halloween Breadstick Bones became more than a mere treat; they became a symbol of treasured moments, connecting generations with each bite.
Flavor and Popularity
The Unique Flavor Profile of Cheesy Halloween Breadstick Bones
Cheesy Halloween Breadstick Bones are not just fun to make; they are brimming with a delightful mix of flavors that keep everyone coming back for more. The base of these breadsticks is made from a buttery, herb-infused dough, which pairs perfectly with melty cheese that oozes delightfully from within. Each bite reveals the warmth of garlic and the flavorful notes of your favorite melty cheese—think gooey mozzarella or sharp cheddar.
You can also add a pinch of Italian herbs like oregano or thyme to elevate the dish, creating a pleasing aromatic experience. The blend of textures—the flaky bread crust and the soft, cheesy center—certainly adds to the allure. These breadsticks are more than just side snacks; they add a silly, yet hearty, touch to any Halloween gathering.
Why This Recipe Is a Family Favorite and Crowd-Pleaser
When it comes to family gatherings or neighborhood Halloween parties, I often find myself gravitating toward this playful recipe. The beauty of Cheesy Halloween Breadstick Bones is how effortlessly they bring people together. My grandchildren love helping to shape the dough, and their excited giggles fill the air when it comes time to pull the breadsticks out of the oven, golden-brown and bubbling with cheesiness.
It’s the sheer joy of sharing these fun, delicious bones with family and friends that makes this recipe a perennial favorite. Whether serving them as a spooky snack or an irresistible accompaniment to soups and chili, they never fail to elicit smiles. Indeed, they are a simple, whimsical way to carve out lasting memories.
Essential Ingredients and Possible Substitutions
To create these enchanting Cheesy Halloween Breadstick Bones, you will want to gather a few essential ingredients. Here’s what you’ll need:
- All-purpose flour: This forms the backbone of your breadsticks. For a gluten-free option, use a 1:1 flour substitute.
- Instant yeast: This helps the dough rise, giving it a lovely fluffy texture.
- Warm water: The perfect temperature for activating the yeast—think bathwater warmth, not hot!
- Salt: Essential for flavor, enhancing the overall taste of your dough.
- Butter: Use unsalted butter for a rich, buttery flavor without an overly salty finish.
- Cheese: Mozzarella is my go-to for that perfect melt, but feel free to mix in cheddar or pepper jack for a spicy twist.
- Garlic powder: This gives the bread a delightful punch.
- Dried herbs (optional): Basil, oregano, or thyme add an aromatic touch that transports you straight to a pizzeria.
If you need substitutions, don’t worry! You can use almond or coconut flour to make these breadsticks gluten-free, or even replace the yeast with baking powder for a quicker version. Experiment with different cheeses like gouda or fontina for a unique flavor twist.
Step-by-Step Recipe Instructions with Tips
Making Cheesy Halloween Breadstick Bones is as easy as it is fun! Just follow these steps:
Prepare the Dough:
In a large mixing bowl, combine warm water and yeast. Let it sit for about 5 minutes until bubbly. Mix in melted butter, salt, garlic powder, and herbs. Gradually add the flour, one cup at a time, mixing until a dough forms.Knead the Dough:
Move the dough onto a lightly floured surface. Knead for about 5-7 minutes until the dough is elastic. If it feels sticky, add a bit more flour, but be careful not to overdo it.First Rise:
Place the kneaded dough in a greased bowl, cover it with a clean kitchen towel, and let it rise in a warm place for about an hour, or until it has doubled in size.Shape the Breadsticks:
Punch down the risen dough and turn it out onto a floured surface. Divide the dough into equal portions. Roll each portion into a thin rope, then shape them into bones by creating two slightly thicker ends resembling bone ends.Fill with Cheese:
Before fully shaping them, press a strip of your chosen cheese into the center of each bone shape, ensuring it’s well enclosed within the dough.Second Rise:
Place the shaped breadsticks on a baking sheet lined with parchment paper. Cover them again and let them rise for another 30 minutes.Bake:
Preheat your oven to 375°F (190°C). Bake the breadsticks for about 15-20 minutes, until they are golden-brown and the cheese is bubbling out.Cool & Serve:
Allow them to cool slightly on a wire rack before serving. I love sprinkling a little extra garlic powder and herbs on top before taking them to the table.
How to Cook Cheesy Halloween Breadstick Bones Perfectly
Cooking these breadstick bones might sound simplistic, yet it’s the small details that elevate them into something magical. To achieve that perfect balance of crispy on the outside and ooey-gooey on the inside, follow these tips:
- Temperature Check: Make sure your oven is fully preheated. This step is essential to ensure your breadsticks rise correctly as they bake.
- Don’t Open the Oven Door: While they are baking, resist the urge to peek too often. Opening the door can cause a rapid temperature drop, preventing proper baking.
Common Mistakes to Avoid
Creating the best Cheesy Halloween Breadstick Bones is straightforward, but it’s easy to slide into some common pitfalls. Here’s what to watch out for:
- Not Enough Kneading: Kneading develops gluten, which gives bread its structure. Aim for at least 5-7 minutes of kneading.
- Overstuffing: While it’s tempting to load up on cheese, overstuffing the dough can cause it to burst during baking and lose that wonderful “bone” shape.
- Ignoring Rise Times: Allowing the dough to rise properly is crucial for achieving fluffy breadsticks. Don’t rush this process—give it the time it needs.
Nutritional Value of Cheesy Halloween Breadstick Bones
While Cheesy Halloween Breadstick Bones are undoubtedly a treat, they can also provide some nutritional value when enjoyed in moderation. These breadsticks incorporate carbohydrates from the flour for energy, calcium from the cheese to support bone health, and small amounts of protein. When served alongside a nourishing soup or salad, they create a balanced meal.
Best Ways to Serve and Pair This Dish
Cheesy Halloween Breadstick Bones don’t just stand on their own! They make the ideal accompaniment to a range of dishes. Here are some suggestions:
- With Soups: Serve these warm breadsticks alongside pumpkin or tomato soup for a spooky but satisfying meal.
- With Dips: A cheesy marinara or garlic aioli brings a delightful twist, serving as both a dip and a flavorful enhancement.
- On a Charcuterie Board: Include these bones among an array of meats, cheeses, and fruits to liven up any party spread.
What type of mushrooms are best for Cheesy Halloween Breadstick Bones?
For these Cheesy Halloween Breadstick Bones, you may want to choose mushrooms that offer a rich, umami flavor. I prefer using cremini or button mushrooms because they blend beautifully with the cheese and herbs. If you’re seeking something different, shiitake or portobello can work wonderfully too!
Can I use dried garlic instead of fresh?
Absolutely! While fresh garlic can elevate the flavor, using dried garlic is a convenient alternative. Just remember that dried garlic is more concentrated, so use half the amount to start and then adjust to taste.
How do I store leftover Cheesy Halloween Breadstick Bones?
If you’re lucky enough to have leftovers, store them in an airtight container once they have cooled completely. They will keep well in the refrigerator for about 3-4 days. To reheat, pop them in the oven for a few minutes until warm, to preserve that delightful texture.
Can I freeze Cheesy Halloween Breadstick Bones?
Yes, indeed! You can freeze these breadsticks before baking. Simply shape them, place them on a baking sheet to freeze, and once solid, transfer them to a freezer bag. You can bake them straight from the freezer; just add a couple of extra minutes to the baking time.
As the ghosts and goblins come knocking, I encourage you to bring some magic into your own kitchen with this delightful recipe. If you’re like me, there’s something comforting about creating fun, themed treats that bring everyone together. With each Cheesy Halloween Breadstick Bone, you not only serve up smiles but also weave a tapestry of memories that connect loved ones in the most heartwarming way. So go ahead, give it a try! Trust me, you’ll want to make this again and again.
Print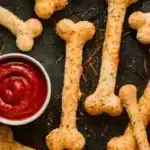
Cheesy Halloween Breadstick Bones
- Prep Time: 30 minutes
- Cook Time: 20 minutes
- Total Time: 50 minutes
- Yield: 12 breadsticks 1x
- Category: Appetizer
- Method: Baking
- Cuisine: American
- Diet: Vegetarian
Description
Delightful cheese-filled breadsticks shaped like bones, perfect for Halloween gatherings.
Ingredients
- 2 1/4 cups all-purpose flour
- 1 packet instant yeast
- 3/4 cup warm water
- 1 teaspoon salt
- 2 tablespoons unsalted butter, melted
- 1 teaspoon garlic powder
- 1 cup shredded mozzarella cheese
- Dried herbs (basil, oregano, thyme optional)
Instructions
- In a large mixing bowl, combine warm water and yeast. Let it sit for about 5 minutes until bubbly.
- Mix in melted butter, salt, garlic powder, and herbs.
- Gradually add flour, one cup at a time, mixing until a dough forms.
- Move the dough onto a lightly floured surface and knead for about 5-7 minutes until elastic.
- Place the dough in a greased bowl, cover, and let it rise in a warm place for about an hour until doubled in size.
- Punch down the dough and turn it out onto a floured surface. Divide into equal portions and roll each into a thin rope, shaping into bone forms.
- Press cheese strips into the center of each bone shape.
- Place on a lined baking sheet, cover, and let rise for another 30 minutes.
- Preheat oven to 375°F (190°C). Bake for 15-20 minutes until golden-brown and cheese is bubbling.
- Cool slightly on a wire rack before serving, sprinkling with extra garlic powder and herbs if desired.
Notes
For gluten-free, substitute 1:1 flour. Experiment with different cheeses for unique flavors.
Nutrition
- Serving Size: 1 breadstick
- Calories: 150
- Sugar: 1g
- Sodium: 300mg
- Fat: 7g
- Saturated Fat: 4g
- Unsaturated Fat: 2g
- Trans Fat: 0g
- Carbohydrates: 18g
- Fiber: 1g
- Protein: 5g
- Cholesterol: 15mg
Keywords: Halloween, breadsticks, cheesy snack, family recipe, fun food